Sunday, November 29, 2009

Smoked Turkey


For all the non-meat eaters out there, advert your eyes ;-) The day after Thanksgiving Joel smoked a turkey. Since I brined it, I'm taking credit too.

This was the brine recipe I used. http://thepioneerwoman.com/cooking/pws-turkey-brine/

My sister turned me onto this blog. she takes some good food shots.

Note to anyone who wants to try this at home. do not make gravy from the drippings unless you want to eat a plate full of smoke.

Sorry about the rotated picture. it's late and I'm tired.

Camamelized brussels sprouts with pistachios

This hands down was the winner of the night. I followed this recipe exactly but for halving the Brussels sprout and onions. Of course I didn't take a picture of this, but there are some on all recipes where I got this recipe.

http://allrecipes.com/Recipe/Caramelized-Brussels-Sprouts-with-Pistachios/Detail.aspx

Barley & wild pilaf with pomegranate seeds


I'm not even going to post the recipe, since I really did not care for it. It sounded great in theory and healthy to boot. I did seed a pomegranate for the first time. Doing everything underwater is key. The seeds sink to the bottom and pith rises.

Roasted corn pudding in Acorn Squash


I got inspired from 101 cookbooks. I mostly followed the recipe here. http://www.101cookbooks.com/archives/roasted-corn-pudding-in-acorn-squash-recipe.html

Things I learned. I really don't care for anise (who knew it tasted like licorice?) and cheese inside of the corn pudding would have made this even better.

presentation wise though, it wins hands down.

Friday, November 20, 2009

Mexican Calabacitas

This is another healthy (and tasty) Mexican side dish.

5 medium size zucchini or yellow squash (or a mix), peeled and diced
1 can sweet corn, drained
1 onion, chopped
1 can ro-tel tomatoes
2 cloves garlic, finely chopped
olive oil

Heat oil in large skillet over medium heat. Add garlic, zucchini, and onions. Cook until the onion is tender, and then add the corn and tomatoes. Cover the skillet, reduce the heat, and simmer for 15 minutes stirring occasionally.

Sopapilla Cheesecake

Apparently this is an incredibly popular recipe on the web (probably because it is so easy). Once I found it, I found about a million copies of the recipe with slight variations.

Sopapilla Cheesecake
2 (8 ounce) packages cream cheese, softened
1 cup white sugar
1 teaspoon vanilla
2 (8 ounce) cans refrigerated crescent rolls
3/4 cup white sugar
1 teaspoon ground cinnamon
1/2 cup butter, room temperature

Preheat an oven to 350 degrees. Spray a 9"x13" baking dish with Pam. Beat the cream cheese with 1 cup of sugar and the vanilla extract in a bowl until smooth. (I don't have a mixer and was able to do this by hand.) Unroll one can of crescent roll dough and press the two rectangles into the 9"x13" pan to cover the bottom. Evenly spread the cream cheese mixture into the baking dish. Unroll the other can of crescent rolls, press them into a 9"x13" and shape, and put this on top. Stir together 3/4 cup of sugar, the cinnamon, and the butter. Dot the mixture over the top of the cheesecake. Bake in the preheated oven until the crescent dough has puffed and turned golden brown, about 30 minutes. Cool completely in the pan before cutting.

Potato Chimichangas

This recipe is from my neighbor Mary. She's made them for us a few times, and Jake and I both love them! The recipe is not exact, but very flexible. (Really, how can you go wrong with tortillas, potatoes and cheese?)

Chimis
3 russet potatoes
1 green pepper (chopped)
1 onion (chopped)
2 cloves garlic (pressed)
goya adobo seasoning
tortillas
sour cream
shredded cheese

Boil the potatoes until you can easily stick a fork in. (Tip: do this early, and then stick in fridge to cool so that they will be easy to peel.) Peel skins from potatoes, and cut into cubes. Saute the pepper and onions in olive oil. Add the cubed potatoes to the peppers and onions. Sprinkle with adobo (liberally, to taste) and add the garlic.

In each tortilla, put the potato mixture, a spoonful of sour cream, and a little cheese. Wrap and roll. At this point you can either put them in the fridge overnight or cook immediately. Heat slowly either on the grill or on the stove.

Serve with salsa. You can slice these to serve as appetizers, or serve them whole as a main course.

Mexican Layer Salad

I don't usually associate "healthy" with Mexican food (mainly because I love cheese). But after the queso and bean dip, I knew I needed to find something light if we were ever going to make it to dessert. I drew inspiration from a number of similar recipes I found on the web, and this what I came up with.

Of course I forgot to grab my camera until we had already dug in, but you can see the idea.


Mexican Layer Salad

For the salad:
2-3 hearts of romaine chopped
1 medium red onion cut in half and finely sliced
1 can black beans rinsed and drained
1 can corn drained
1 can green chiles drained (mix the corn and green chiles together)
4 plum totaoes, seeded and sliced
1 avocado, sliced
lemon juice (to keep avocado fresh)
shredded cheese

For the dressing:
1/4 cup mayo
1/4 cup sour cream
1/2 cup salsa
2 T fresh cilantro
2 t fresh lime juice
(whisk all dressing ingredients together)

In large glass bowl, layer half the lettuce and follow with half of each of the other ingredients ending with half of the dressing. Repeat with other half. Cover tightly overnight. Before serving, top with shredded cheese. (I'm pretty sure I forgot to top our's with cheese.)

Mmmm... dip!

Bean Dip
This is my aunt Holly's specialty, and we always devour it at family functions.

1 - 8oz brick of cream cheese (softened)
1 - 8oz tub of sour cream (cover your eyes, Emily!)
1 can vegetarian refried beans (refried black beans are particularly delicious)
1/2 package of enchilada seasoning or taco seasoning
1 - 16oz jar of salsa
1 - 8 oz bag of shredded cheese (I usually use the Mexcican blend)

Mix the cream cheese, sour cream, beans, and seasoning together. Spread the mixture in two 8" pie pans. Top with salsa and cover with cheese. Bake for 15-20 minutes at 350. Serve with tortilla chips.


Queso

1 can of Ro-tel tomatoes (undrained)
1 small block of velveeta

Cube up the velveeta and mix in tomatoes. Microwave for 5 minutes or until melted, stirring once in the middle. Serve with tortilla chips. (So easy, but so good!)

August Fiesta

I apologize for holding up the blog... I had the girls (and guys) over for a Mexican-inspired dinner in August, but haven't posted my recipes. Now that we've had two more dinners, I figured I really need to figure out this whole blogging thing. I hope this works. (And I hope I can remember the recipes.)

We were excited to show off our almost-finished basement (which 3 months later is still in the same almost-finished state, so this blog isn't the only thing I've been neglecting), so we scheduled the dinner for a Friday night, bought lots of Mexican beer, and invited the guys. For appetizers we had queso and bean dip (which, let's be honest, was the main reason for the Mexican inspiration). For the main course we had potato chimis, a Mexican layer salad, and some other vegetable dish which I will remember the name of when I dig out the recipe. For dessert it was sopapilla cheesecake. We had a lot of fun watching Molly and Dave rock out to Guitar Hero. (And we had a lot of fun watching everyone else try...)

Recipes to follow... TODAY! (I promise!)

Sunday, August 23, 2009

Breakfast of champions

Show all

Saturdays are the best. There's no work, sleeping in is a must-do and there's always the Saturday morning lazy breakfast. This weekend Mike & I munched on these waffles. They're relatively healthy and they definitely satisfy the need for something sweet in the morning. Even though these seem like a lot of work because the eggs get separated and the whites get folded in. Believe me; it really makes for a lighter waffle. We topped ours with a blackberry syrup, but feel free to use what you like.


Nutty whole wheat waffles

Ingredients:
1 c. whole wheat flour
1 1/2 tsp. baking powder
1/2 tsp. salt
1/2 tsp. cinnamon

3 eggs, separated
1 cup milk
3 Tbsp. butter, melted
1 tsp vanilla extract
1/2 tsp almond extract
1/2 c. chopped nuts (I used walnuts)

Canola or vegetable oil

Special equipment: waffle iron

Directions:
1. In a large bowl combine the dry ingredients and mix with a fork.
2. In a separate, smaller bowl combine egg yolks, milk, butter, and extracts.
3. Beat egg whites to a stiff peak.
4. Pour the milk and egg yolk mixture into the dry ingredients and stir until just combined.
5. Fold in the egg whites and chopped nuts, being careful not to deflate the egg whites.
6. Heat up a waffle iron and lightly oil with canola or vegetable oil.
7. Pour about 2/3 c. of the batter into the waffle iron and cook until the waffle is a golden brown color.
8. Repeat for the remaining batter.

Thursday, August 20, 2009

Carrot cookies

This is an adaptation from a recipe I saw on 101cookbooks.com. I didn't have most of the ingredients, except for the carrots and the oats, but I gave it a whirl anyhow, substituting what I did have on hand. Here's the recipe I made. I kind of like these because they aren't over-the-top sweet, plus it has carrots, so it HAS to be healthy, right?


Carrot cookies

Ingredients:
1 c. whole wheat flour
1 tsp baking powder
1/2 tsp salt (kosher)
1 c. rolled oats
2/3 c. sunflower seeds
1 c. shredded carrots
1/2 c. brown rice syrup (the original called for maple syrup, but alas I was out!)
1/2 c. coconut oil heated through
1 T fresh grated ginger

Directions:
1. Preheat oven to 375 F. Line cookie sheet w/ parchment paper
2. Combine the first 6 ingredients in a large bowl.
3. In a smaller bowl combine the brown rice syrup, coconut oil and ginger. Stir until they are completely combined.
4. Add the liquid mixture to the dry ingredients. Stir until just combined.
5. Drop spoonfuls of the batter onto the prepped cookie sheet.
6. Bake for about 10 minutes until the cookies are golden on top and bottom.
7. Cool on a rack and enjoy (if you can wait that long).

Sunday, August 16, 2009

Zucchini and sun-dried tomato relish

This recipe was inspired by a recipe I saw in Gourmet magazine, but it was made with eggplant. Since Mike is allergic to eggplant, I changed it up to use zucchini, which I think makes it a little more sturdy and relish-like rather than a dip. I think that's part of what makes cooking so much fun... you don't like an ingredient, substitute what you do like. It gives you an opportunity to custom-build the recipe to what you palate enjoys the most.

I originally served this up as a crostini topper at a recent game night, but the next day I sauteed up the relish as a side to eggs over easy. You could also take this as a mix in to a rice salad, or as a flavorful topping to a pizza with a little fresh mozzarella. I apologize that the picture is not that clear, but I think you'll get the idea that it is a colorful addition to the dinner table.


Zucchini and sun-dried tomato relish

Ingredients:
1 head of garlic
6 1/2 Tbsp olive oil, divided
2 1/2 lbs zucchini
1/3 c. oil-packed sun-dried tomatoes, chopped, plus 2 T. tomato oil
1/2 c. chopped flat leaf parsley
1/2 c. chpped basil
1 Tbsp lemon juice

1. Preheat oven to 400 F.
2. Cut off and discard top of garlic head to expose cloves, brush top of head with 1/2 T olive oil. Wrap garlic in foil and roast until tender, about 45 minutes. Cool until you can handle it with your fingers. Squeeze the garlic cloves from the skins into a small bowl, discard the skins.
3. Cut the zucchini into a 1/2 inch dice.
4. Heat 2 T of alive oil in a large skillet over medium heat. Saute the zucchini in three batches (adding salt and pepper to each batch) until it is browned and tender. Transfer to a large bowl.
5. Add about a 1/2 c. of the zucchini to the bowl with the garlic and mash together. Add the mashed mixture to the rest of the zucchini.
6. Stir in the sun-dried tomatoes.
7. Just before serving, stir in the parsley, basil and lemon juice. (If needed, re-season with salt and pepper if needed) Drizzle the top with tomato oil.

Note: You can do steps 1-6 a day ahead. Serve warm, or at room temperature.

Tomato Bake

If you're wondering what to do with your bounty of tomatoes, this is a super-easy recipe. It doesn't take a lot of ingredients and really lets the tomato shine. To make this recipe vegan, just substitute olive oil for the butter.


Tomato Bake
(from Gourmet magazine)

Ingredients:
2 c. coarse fresh bread crumbs
3 lbs tomatoes (preferably beefsteak)
1 1/2 Tbsp chopped thyme
1/2 stick unsalted butter
1 c. hazelnuts, toasted any loose skins rubbed off and coarsely chopped

1. Preheat oven to 450 F and butter a 2 qt shallow baking dish
2. Thickly slice tomatoes and arrange overlapping in the baking dish. Sprinkle with salt and pepper and thyme.
3. In a skillet, melt butter over medium heat and cook the hazelnuts and crumbs, stirring frequently until golden brown. Season with salt and pepper.
4. Spread crumb & hazelnut mixture evenly over the tomatoes.
5. Bake until tomatoes are bubbling and crumbs are browned (15 to 25 minutes).
6. Serve warm or at room temperature.

Tuesday, August 11, 2009

Patatas bravas

Jaleo--a local chain around DC-- used to serve this dish up as chunks of tomatoes, with tomato sauce and garlic aioli. Lately, though they've changed the recipe, so now it's potato chips with the same sauces. While, the new version is good, it's not exactly what I LOVE. So, here's my take on that recipe. It's really 3 easy recipes in 1. Once you make these you'll want to eat the whole bowl. I usually serve this with roasted asparagus, or salad, or even a couple of cheeses & bread.

Patatas Bravas:
Roasted potatoes
1 1/2 lbs of potatoes (I used some colorful fingerlings)
2 tbs olive oil
salt & pepper to taste

Aioli:
1 head of garlic
2 T olive oil divided
2/3 c. prepared mayo
juice of 1 lemon
salt to taste

1 c. of romesco sauce http://econkitchenchicks.blogspot.com/2009/08/back-from-hiatus.html, warmed through.

Preheat oven to 400 degrees F

1. Slice the head of garlic in half across the equator. Drizzle with a glug of olive oil and wrap in foil and place in the oven. (you can do this ahead of time)
2. Cut the potatoes into bite-sized chunks (somewhat a little bigger than 1")
3. Place the potatoes on a cookie sheet and drizzle with 2 T of olive oil, a generous pinch of salt and pepper. Toss with your fingers to get the potatoes coated with the olive oil
4. Place the cookie sheet in the oven and set the timer for 30 minutes, giving the potatoes a toss about 1/2 way through.
5. After the garlic has spent about 30 minutes in the oven, it should be nice and honey-golden colored. If' it's still pale looking, let it go a little longer.
6. One the garlic has cooled to the touch, squeeze out the roasted cloves and combine with mayo, 1 T olive oil, salt, and lemon juice. I sometimes use a food processor, or sometimes I just mash it all up with a fork. Do whatever feels easiest.
7. Once the potatoes have gone for 30 minutes, check to make sure they have a nice brown color on them. If not, let them go a couple more minutes... This will be a personal call. I like my potatoes really crispy.
8. Assemble. Place potatoes on bottom, spoon over the romesco sauce, and dot with your aioli.
9. Enjoy!

Monday, August 10, 2009

Paella

Paella is one of those dishes that I always assumed was difficult and not terribly friendly to the herbivores. I ran across a recipe in Mark Bittman's How to Cook Everything Vegetarian. It is now one of my go-to meals. You do need a pan that can go from stovetop to the oven, but other than that, no special equipment necessary. I use my enormous cast-iron Le Creuset braiser, but I'm sure my 12-inch stainless skillet would also do the trick.

I've made this recipe many different ways, using whatever I have on hand. The version I'm posting now, is for spinach & lemon, but you could certainly mix up the flavors. Some combos I've tried successfully have been oranges & green olives, mushrooms & thyme, shrimp & oranges, tomatoes and capers.


Lemon-Spinach Paella

adapted from How to Cook Everything Vegetarian


Ingredients:

One medium-sized onion, minced

2-3 cloves of garlic, minced or pressed

2 c. arborio (or any short grain) rice

1 T. tomato paste

1 T. smoked Spanish paprika (also called pimenton)

4 c. vegetable stock (or whatever stock you have on hand, even water will suffice)

1/4 c. Olive oil, divided

1 bag pre-washed spinach

zest and juice of 1 lemon


Directions:

1. Preheat oven to 450 degrees F.
2. Heat 3 T. of olive oil in a large skillet (with tall edges) over medium heat.
3. Add in the onions and garlic, stirring occasionally until they turn translucent.
4. Meanwhile, in a large bowl combine spinach, lemon zest & juice with remaining tablespoon of olive oil, salt & pepper to taste. Toss to coat the spinach leaves with olive oil & lemon juice.
5. Add the rice, tomato paste and paprika to the skillet. Add a little sprinkling of salt here too.
6. Once rice has started to become fragrant (1-2 minutes), add the stock.
7. Turn off the burner heat and add spinach mixture to the top of the skillet.
8. Move skillet to the oven for 15 minutes.
9. After 15 minutes if the liquid has mostly been absorbed, turn off the temp in the oven and let the paella sit inside the turned off oven for an additional 5 minutes. (if the liquid has not been absorbed, let it go in an active oven for another 4-6 minutes, or until absorbed).

10. Enjoy.

Back from hiatus


I have been somewhat remiss in posting things here. I could blame vacation, but that was nearly a month ago now, so I guess it will be down-right laziness.

In June (yeah, that long ago) I had the ladies over for our supper club and served up a spinach-lemon paella and roasted asparagus with romesco sauce.

Romesco is quite possibly my new favorite thing. This sauce is good on so many things. It would do well on any roasted veggie (think asparagus, potatoes, summer squash). It's also really great with a fried egg.

There are as many recipes for romesco sauce as there are for chocolate chip cookies, but the version I made did a combo of several versions I saw online. The key ingredients are: roasted red peppers, nuts, bread, and smoked spanish paprika (also called pimenton). If you've never had smoked Spanish paprika, you really should try it. It imparts just a slight smoky-sweet flavor to whatever you put it in. A little does go a long way, so proceed cautiously your first time using it.

Romesco sauce
4-6 cloves of garlic
1 tomato, diced
2-3 slices of stale french bread
4-5 roasted red peppers, blackened skin and seeds removed
1/2 c. almonds, lightly toasted
1-2 Tblsp. smoked Spanish paprika
Olive oil

1. Heat 3 T. Olive oil in a skillet over medium low heat.
2. Add garlic cloves whole to the skillet.
3. When the garlic cloves start to turn golden brown, remove from pan to a food processor or blender.
4. Add the diced tomato to the skillet and cook until softened (2-3 minutes) and then moved to the food processor.
5. Add the French bread to the skillet. Cook until both sides of the bread are golden brown and move bread and remaining olive oil to the food processor.
6. Add remaining ingredients (except olive oil) to the food processor.
7. As you blend, stream in about 1/4 c. of olive oil or until the mixture has a slightly smooth texture. Taste, and adjust the salt and smoked paprika.

You don't want it super-smooth, just smooth enough so that you can see tiny bits of the almonds.

Enjoy!

Tuesday, June 16, 2009

Tastes like summer


Now that the weather has finally gotten over the whole 'rain every single day for 3 weeks' thing, it is finally starting to really feel like summer. I don't know if it's the warm weather or the fact that the humidity is 80 percent, but it really makes me crave those cool salads. This salad is great for those kind of days when all you really want to do is read with a tall glass of cucumber water or lie by the pool. (or perhaps I am the only one who has these sorts of days) This salad is cool and crunchy with lots of herbs to perfume your mouth with the tiniest bit of heat at the end. There is a little planning involved here, but I think it is worth the time. Anywho, here's the recipe.

Vietnamese Noodle Salad
From Moosewood Daily Special
Cook's note: I used shrimp in this recipe because it's what we had on hand. Tofu, chicken, or beef would also be lovely.
Husband of Cook's note: Mike thought this should have had more shrimp.

Dressing:
1/2 c. vegetable oil
1/2 c. rice vinegar
1 T. dark sesame oil
1 T. sugar
1/4 c. lime juice, freshly squeezed
2 T. soy sauce
1 tsp. red pepper flakes
1 T. lime zest

Salad:
1 pound of shrimp, peeled & deveined
1 pound rice sticks (linguine will do if you can't find rice sticks)
4 c. shredded green cabbage (I Sandra Lee'd it and used the bagged cole slaw mix)
1 c. chopped fresh herbs: cilantro, basil, scallions (I actually did a little more than this, maybe 1 1/3 c.)
1 large bell pepper, cut into matchsticks

1. Whisk together the dressing ingredients.
2. Place shrimp in a bowl, toss with 1/2 c. of the dressing. Cover and refrigerate for at least 2 hours, or up to 24 hours.
3. In a separate container refrigerate the rest of the dressing.
4. Just before serving saute or grill the shrimp for 2-3 minutes, until just cooked through. Set aside on a plate.
5. Heat up a large pot of water to boil.
6. Once the water has come up to a boil, add rice sticks (or linguine) and cook until al dente. The time for rice sticks will be about 4 minutes.
7. Drain the noodles and rinse with cold water. Let drain.
8. Combine the noodles, cabbage, bell pepper, herbs, dressing and shrimp. Toss well with tongs.
9. Enjoy!

Monday, May 18, 2009

Chocolate Chip Cookies on Crack

A few weeks ago Kim mentioned these in one of her blogs. I knew immediately I wanted to try it because who doesn't love cookies and ice cream? A big shout-out to Rebecca for actually mixing the cookies for me - otherwise we would have just eaten ice cream and that wouldn't have been nearly as fun.

http://voices.washingtonpost.com/mighty-appetite/2009/04/chocolate_chip_cookies_on_crac.html

I used the recipe that Kim suggests (although any recipe you like would do). It nicely filled 6 4-inch ramekins (see picture). I topped with caramel ice cream and it was heavenly.

Elegant Orzo with Wilted Spinach and PIne Nuts

I found this when I searched allrecipes.com using the ingredients spinach and red pepper. In this case it was calling for red pepper flakes, which I went light on, but caught my eye none the less. This was good warm and cold (the next day as left overs). This strikes me as a very forgiving recipe so adding and subtracting at will is probably OK. I think adding fresh basil at the end would make it very good too.

INGREDIENTS
1 (16 ounce) package uncooked orzo
1/2 cup olive oil
2 tablespoons butter
1/2 teaspoon minced garlic
1/2 teaspoon dried basil
1/2 teaspoon crushed red pepper flakes
1 cup pine nuts
1 (10 ounce) bag baby spinach
1/8 cup balsamic vinegar
1 (8 ounce) package crumbled feta cheese
1/2 fresh tomato, chopped (I used 1 package of grape tomatoes cut in half)
salt to taste

DIRECTIONS
Bring a large pot of lightly salted water to a boil. Add pasta and cook for 8 to 10 minutes. (Firm or slightly undercooked orzo works best for this dish.) Drain, transfer to a mixing bowl, and set aside.
Heat olive oil and butter in a large skillet over medium high heat, stirring to blend. Stir in garlic, basil, and red pepper flakes, and reduce heat to medium. Stir in pine nuts and cook until lightly browned. Add spinach, cover, and cook on low heat for 5 minutes, or until spinach is wilted.
Toss spinach mixture with orzo pasta. Portion onto serving plates with a drizzle of balsamic vinegar and a sprinkling of crumbled feta cheese and chopped tomatoes. Allow guests to adjust seasoning with salt, as needed.

Summer Squash Pizza Crust

This was fairly easy and good - however, I would line the pan with parchment paper for easier flipping -Rebecca had the misfortune to watch me try to flip this without it. I shredded the zucchini and yellow squash the night before. Draining excess liquid from the squash is key. I served with tomato sauce and a cheese spread, although pesto would be good too. and of course actually using as a pizza crust would probably be a good idea too.

Ingredients:
4 cups finely shredded zucchini or yellow summer squash
3/4 cup all-purpose flour
3/4 cup grated Parmesan cheese
1/2 cup shredded mozzarella cheese
2 eggs, beaten
1/2 teaspoon ground black pepper
salt to taste

Directions:
1. Preheat oven to 350 degrees F.
2. Once zucchini or summer squash has been shredded lightly salt the squash and transfer it to a strainer. Let stand 15 to 30 minutes and press all remaining liquid out of squash.
3. In a medium-sized mixing bowl, combine squash, flour, Parmesan cheese, mozzarella cheese, eggs, pepper and salt. Mix well.
4. Spread the mixture into a greased and floured jelly roll pan (line with parchment paper!). Bake for 25 minutes in the preheated oven.
5. Remove the crust from the oven and change the oven's temperature to broil. Brush the top of the crust with oil, and then broil the crust for 3 to 5 minutes until the top is lightly browned.
6. Allow the crust to cool slightly and slide spatula underneath all edges and under the middle. Place a large baking sheet over the top of the crust and gently flip the crust over so that the bottom of the crust is now facing upwards. Because it can be difficult to flip the crust smoothly, it may be necessary to cut the crust in half to facilitate the flipping of the crust.
7. Brush the top of the crust with oil (I added chopped fresh rosemary) and broil for another 3 to 5 minutes until the top is browned.

Cover with toppings as desired.

Friday, May 15, 2009

Zucchini and crack


Elegant Orzo with Wilted Spinach and Pine Nuts

Chocolate Chip cookies on Crack

The usual dinner crew with a few additions.

My menu was inspired by 2 different things: zucchini and crack -- one was on sale at the market, the other recently written about in a blog by the lovely Kim O'Donnell http://voices.washingtonpost.com/mighty-appetite/?hpid=news-col-blog-viewall.

Tuesday, May 5, 2009

Stir-fried chicken with lime and coconut

This recipe was originally published in How to Cook by Delia Smith, but I found it in another compilation of recipes. There are two things I love about it:

1. It tastes complicated, but it's actually really easy with relatively few ingredients, so it makes for a great weeknight meal.
2. It's already scaled for two servings, so I don't have to convert any measurements or end up with a big batch of leftovers. (Not that there is anything wrong with leftovers, but sometimes you just don't want to deal with them, you know?)

Anyway, here it is...

  • 2 boneless skinless chicken breast halves
  • Grated zest and juice of 1 large lime

  • 2 tsp. olive oil

  • 1 hot green chile pepper, seeded and finely chopped

  • 2/3 c. canned unsweetened coconut milk

  • 2 tsp. fish sauce (nam pla)

  • 4 scallions, cut into 1-inch shreds (including the greens)

  • 6 tablespoons chopped fresh cilantro

  • Cooked jasmine rice, for serving


Cut the chicken into bite-sized pieces. In a medium bowl, combine the chicken and lime zest and juice. Stir well and let marinate for 1 hour.

In a wok or large skillet, heat the oil over high heat. Add the chicken and stir-fry for 3 to 4 minutes, or until golden. Add the chile and stir-fry for 1 minute more. Add the coconut milk, fish sauce, half the scallions, and 3 tablespoons of the cilantro. Cook for 1 to 2 minutes more. Serve with jasmine rice and sprinkle the remaining scallions and cilantro over the top.
------------------------------------------------------
This works out really slick... I zest and squeeze the lime while defrosting a couple of frozen chicken breast halves. Once I have chopped the chicken and gotten it marinating, I have about half an hour to get a load of laundry going, check my e-mail, whatever. Then I start the rice, and while it's cooking I chop the chile, scallions, and cilantro. After that I can get out the rest of the ingredients and start the stir-fry. By the time it's done, so is the rice... perfect!

I'm guessing that you could easily substitute shrimp or even tofu into this recipe, though you would need to adjust your marinating and stir-frying time. If you go the tofu route, you can make the dish vegan by substituting light soy sauce for the fish sauce and adding a pinch of sugar. Your dish won't have that distinctive fish sauce twang, but at least you'll get the salty-sweet aspect of it.

Also, I've found that I use less cilantro and scallion than the recipe calls for, only about 4 tablespoons cilantro and 3 scallions. That's still a lot of flavor but fewer leafy bits to get stuck in your teeth.

Sunday, April 12, 2009

Baked artichokes with Gorgonzola and herbs


Artichokes are another very Italian food, and since they are back in season I wanted to incorporate them into dinner, too. I had never cooked one before, because they struck me as a high-maintenance vegetable: they are easy to overcook or undercook, their cut surfaces brown almost immediately, they have fuzzy inedible junk in the middle of them, and they are sort of a mess to eat, as you pull off leaves one and a time and drag them between your teeth to get the good stuff out, and you discard the rest. Fussy, no?

However, they are delicious.

One of the purposes of us girls having our dinner club is to try making things we have never cooked before, expanding our culinary repertoires. I enjoy looking for new dishes to challenge me in the kitchen.

The following recipe is not from The Silver Spoon (although that cookbook dedicates eight pages to the lovely carciofi) but instead comes from Giada de Laurentiis of the Food Network.

Baked artichokes with Gorgonzola and herbs

Salt
4 artichokes
3 lemons
10 ounces Gorgonzola cheese, room temperature (MG - I recommend a Gorgonzola dolce rather than one of the stronger varieties)
2 tablespoons cream
2 teaspoons chopped fresh thyme leaves
2 teaspoons chopped fresh parsley leaves, plus 1 tablespoon for garnish
1 clove garlic, minced
1/2 teaspoon freshly ground black pepper
3 tablespoons bread crumbs
1 tablespoon olive oil

Bring a large pot of salted water to a boil over high heat.

Trim the artichokes by cutting off the top 1-inch or so. Cut the stem close to the base of the artichoke, so that the artichoke can sit up straight, and remove some of the bottom leaves. Using kitchen shears, trim the sharp points off any of the remaining outer leaves. (MG - at this point, I recommend having a bowl of acidulated water ready for your artichokes, so you can drop them in as you finish trimming them. They get brown fast!)

Add artichokes to the boiling water. Halve the lemons and squeeze the juice into the boiling water. Toss in the lemons.

Cook the artichokes until tender, about 30 minutes. Drain and let cool.


Boiling the artichokes with the lemons


Meanwhile, in a small bowl stir together the Gorgonzola, cream, thyme, 2 teaspoons parsley, garlic, salt, and pepper. In another small bowl, stir together the bread crumbs and remaining 1 tablespoon of parsley.

Preheat the oven to 400 degrees F.

Remove the center choke of the artichokes using a small spoon. Stuff the cheese mixture into the center of the artichokes.

Place the artichokes into a baking dish. Sprinkle the bread crumb mixture over the top of the artichokes, and drizzle with olive oil. Bake until the artichokes are heated through, the cheese is melted, and the bread crumbs are crisp and golden, about 25 minutes. Transfer to a serving dish and serve.

Makes 4 servings.


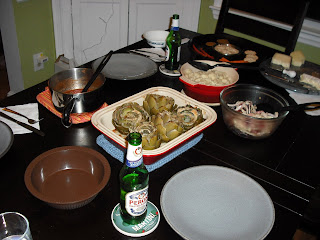
The finished products, clockwise from top: Italian white bean hummus;
potato gnocchi; a selection of Italian cheeses; fennel,blood orange, and
walnut salad, baked artichokes with Gorgonzola and herbs, and tomato
sauce (notice the fancy serving dish).

Italian white bean hummus

An Italian twist on a Middle Eastern favorite, courtesy of chef Sabra Ricci. I served this as an appetizer before dinner with crackers, baby carrots, and red pepper slices.

Italian white bean hummus

2 c. white beans, canned, drained, and rinsed
1/4 c. tahini
1/4 c. lemon juice
2 teaspoons garlic, minced
1 tsp. cumin powder
Dash cayenne
2 oz. extra virgin olive oil
Warm water

Combine beans, tahini, lemon juice, garlic, cumin, and cayenne in a food processor. Blend and gradually add oil and warm water until the mixture has a creamy consistency.

Refrigerate overnight for the best flavor.

Makes 16 servings.

La Notte del cucchiaio d'argento (Silver Spoon night)

I was the host of the most recent dinner with the girls, and Emily's foray into Indian inspired me to crack open a cookbook of my own that had been collecting dust for years: The Silver Spoon, Italy's answer to The Betty Crocker Cookbook. At nearly 1300 pages, this ponderous book intimidates with both its size and the sheer volume of recipes and information. Not only that, but many of the recipes contain ingredients that are a mystery to even a foodie like me. Cardoons? Porgy? Woodcock? The Silver Spoon was clearly out of my league.

But if Emily could brave her Indian cookbook, filled with even more difficult recipes and exotic ingredients, surely I could rise to the challenge of authentic Italian. I ended up choosing four recipes from The Silver Spoon for my meal: potato gnocchi; tomato sauce; fennel, orange, and walnut salad; and cream and chocolate semifreddo.

The translations of the recipes from the original Italian to English are largely pretty decent, though the occasional idea gets lost sometimes. For example, the gnocchi recipe called to mash the potatoes with a potato masher -- which in my world is one of those bent- or perforated steel tools with which you bash the life out of potatoes in the pot till they are (mostly) smooth -- when what you really need is a potato ricer to give the potatoes an even consistency. I didn't realize this till it was too late, but I managed to work most of the remaining lumps out of the dough with my hands.

That aside, I was happy with how the recipes turned out... and more importantly, my dining partners seemed to enjoy the meal, too. I am no longer afraid of The Silver Spoon, and I look forward to exploring more of its treasures. But I'll pass on the woodcock and cardoons.


Julie and Rebecca, enjoying a Peroni before dinner

Potato gnocchi (basic recipe)
2-1/4 pounds potatoes
1-3/4 c. all-purpose flour, plus extra for dusting
1 egg, lightly beaten
salt
choice of sauce, to serve

Steam the potatoes for 25 minutes until tender, (MG - I don't have anything big enough to steam that many potatoes, so I boiled 'em and that worked fine.) then mash with a potato masher (MG - a.k.a. "ricer") while they are still hot.

Stir in the flour, egg, and a pinch of salt and knead to a soft, elastic dough. Be careful with the ratio of potato to flour: if there is too much flour, the gnocchi will be hard; if there is too much potato, the gnocchi will disintegrate while cooking.

Shape the dough into long rolls just over 2/3 inch in diameter and cut into 3/4-inch lengths. Press them gently against a grater and arrange on a dish towel dusted with flour.

Bring a large pan of lightly salted water to a boil, add the gnocchi a few at a time, and remove with a slotted spoon as they rise to the surface. Drain, put on a warm serving dish, and pour your chosen sauce over them.

Allegedly, makes 4 servings. Unless this is your only dish, this will feed 4 NFL linebackers. That said, the resulting gnocchi are feather-light and practically dissolve on the tongue; they would make any Italian nonna proud.


Fresh gnocchi before they were cooked


My choice of sauce to go with was:

Tomato sauce

Even with canned tomatoes, the resulting flavor of this sauce is fresh and lovely, thanks to the fresh garlic and basil. Sometimes the simplest recipes are the nicest.

9 ounces canned tomatoes or fresh tomatoes, peeled
Pinch of sugar
2 garlic cloves
2 tablespoons olive oil
10 fresh basil leaves, torn
Salt

(MG - Canned tomatoes come in 14-oz. sizes in the U.S., so that is what I used. I increased the rest of the ingredients by half, accordingly.)

Put the tomatoes, with their can juice if using canned tomatoes, into a pan and add the sugar, garlic, and a pinch of salt. Cover and cook over a very low heat for about 30 minutes without stirring. Mash the tomatoes with a wooden spoon and, if using canned tomatoes, cook for a further 15 minutes. Remove the pan from the heat and let cool. Stir in the olive oil and basil.

Again, this allegedly serves 4. It was enough for us at the table, but it was not enough sauce for the whole batch of gnocchi (of which there were many leftovers). If I could do it again, I would triple or quadruple the recipe to serve with the gnocchi.

Monday, March 23, 2009

I know this is a cooking blog BUT

if you are ever in the mood for a real Maryland crab cake and are near this place you should check it out http://www.gandmrestaurant.com/. They only take reservations for groups of 5 or more and it does get packed as this is definitely a local establishment (re - no dress code). For the meat eaters of the group, the pork chops are also a great deal (and good).

Anyway, I had the crab cakes for dinner this Friday (takeout and it was just as good as eating there) and decided to share the word.

Sesame Pasta Salad

This one is for Katie by special request. I like this pasta salad as it's easy to make and does not contain the white death in any form. It's also good cold and even better the longer it sits.

To make it even heartier you could add chicken (I've found that rotissery chicken works really well) or cherry tomatoes or red pepper strips or anything really.

INGREDIENTS
1/4 cup sesame seeds
1 (16 ounce) package bow tie pasta
1/2 cup vegetable oil (JHM - I usually use closer to a 1/3 cup)
1/3 cup light soy sauce
1/3 cup rice vinegar
1 teaspoon sesame oil (optional - but I use it)
3 tablespoons white sugar
1/2 teaspoon ground ginger
1/4 teaspoon ground black pepper
1/3 cup chopped fresh cilantro
1/3 cup chopped green onion

DIRECTIONS
1. Heat a skillet over medium-high heat. Add sesame seeds, and cook stirring frequently until lightly toasted. Remove from heat, and set aside.

2. Bring a large pot of lightly salted water to a boil. Add pasta, and cook for 8 to 10 minutes, or until al dente. Drain pasta, and rinse under cold water until cool. Transfer to a large bowl.

3. In a jar with a tight-fitting lid, combine vegetable oil, soy sauce, vinegar, sesame oil, sugar, sesame seeds, ginger, and pepper. Shake well. (a zip lock bag will do in a pinch, just make sure it's sealed tightly)

4. Pour sesame dressing over pasta, and toss to coat evenly. Gently mix in cilantro and green onions. (I usually put it in a zip lock bag - save room in refrigorator or cooler until ready to serve). Is ok at room temp for awhile as there isn't anything to spoil.

Thursday, March 5, 2009

Beat this Rachael Ray


Ok, I'm not food blog ignorant. I do understand that people want to see pictures of the actual food, not empty plates, but this was so good and let's be honest we were pretty hungry that the idea to actually blog about this recipe didn't strike until after everything had been polished off.

This is quite possibly one of the quickest meals I have ever made, hence the blog title. This dish is not only quick and easy, but it was very tasty. It may even become one of our regular press release week meals.

Basil & Tomato Shrimp
Adapted from an Ellie Krieger episode

Ingredients
1 lb shrimp, peeled and deveined (we used the frozen stuff that had been defrosted)
12 oz. cherry tomatoes, halved
1/4 c. basil, chopped
2 T. garlic, chopped
2 T. olive oil
1 c. white wine
Salt and pepper to taste

Directions
1. Heat the olive oil in a large skillet over medium high heat.
2. Add the shrimp and saute for 1 minute; turn the shrimp and saute for another minute. You want the shrimp to start to turn pink, but not completely cooked through.
3. Remove the shrimp from the pan to a plate.
4. Using the same pan, add the garlic and saute for about a minute.
5. Add in the tomatoes and saute for another minute.
6. Add the wine and let it come up to a bubble (2-3 minutes).
7. Add the shrimp back into the mixture and let them come up to temperature. (1 minute)
8. Season with salt and pepper and add in the basil.
9. Serve and enjoy.

Mike & I had this over orzo with a salad on the side. It really was a perfect light meal.

Tuesday, February 24, 2009

Pistachio cardamom cake


This is a dense cake which is reminiscent of Middle Eastern cuisine, but I used it as the sweet end to the Indian inspiration dinner. This cake with its rich buttery pistachio crumb and the underlying warmness of the cardamom is a sure-fire hit. The cake is drizzled with a lemon syrup which makes the flavor nice and light.

If you've never worked with cardamom it tastes a little bit like cinnamon, but with a little more heat. For the longest time, I held off on buying this spice because it's kind of expensive, and I wasn't sure what else I would use it for. Well, the possibilities are many. You can use a 1/2 tsp. or so of cardamom pretty much anywhere you'd use cinnamon: think cinnamon buns, any cake mix, apple pie, pancake/waffle/crepe batter, or even sprinkled on your morning yogurt with fruit.

You can buy cardamom in 2 forms: pod and ground. The ground cardamom is what is used in this recipe it is simply the tiny seeds from the cardamom pod that have been finely ground down. The pods are also handy (though slightly more difficult to find). I usually throw the pods into the rice pot or stew-like dishes to intensify the flavor--4 to 6 are usually plenty.

Pistachio Cardamom Cake (from Moosewood New Classics)

Ingredients
Cake:
1/2 c. unsalted butter, at room temperature
3/4 c. sugar
3 eggs
1 tsp. pure vanilla extract
1 c. semolina flour
1/2 tsp. ground cardamom
1/2 tsp. ground cinnamon
1/4 tsp. salt
1/2 c. unsalted pistachios, plus 12 whole pistachios
1/2 c. nonfat plain yogurt

Syrup:
1/4 c. water
1/4 c. sugar
1 tsp. lemon zest
1 Tbs. lemon juice

Directions:
1. Preheat the oven to 350 F. Butter a 7X11 inch baking dish
2. With an electric mixer, cream the butter and sugar.
3. Add the eggs, one at a time, beating after each addition.
4. Add the vanilla
5. Grind 1/2 c. of the pistachios in a spice grinder (or food processor) to the consistency of a coarse meal.
6. In a separate bowl, combine the semolina, cardamom, cinnamon, salt, and pistachios.
7. In alternating batches, add the yogurt and the dry ingredients to the creamed mixture, beating well after each addition, to form a smooth batter.
8. Spread the batter inot the prepared pan. Bake for about 30 minutes, until a knife inserted in the center comes out clean.
9. About 5 minutes before the cake is done, combine the syrup ingredients in a saucepan and bring to a boil. Boil rapidly for about 2 minutes and then remove from heat and set aside.
10. When the cake is ready, cut it in half lengthwise and then cut it into thirds crosswise to form six square pieces. Cut each square on the diagonal to make 12 triangular pieces.
11. Pour the syrup evenly over the cake and gently press one whole pistachio into the center of each triangle of cake.

Sunday, February 22, 2009

Baked Lentil Samosas


These were the perfect start to the Indian inspiration dinner. The great thing about these is that you can do the dough and the filling ahead of time and let them rest in the refrigerator. You can also assemble the samosas and freeze them until when you're ready to bake them. The filling I use here is a thick lentil curry, but any thick curry will do. Serve with a chutney or Greek yogurt spiced up with curry powder. This recipe comes from How to cook everything vegetarian by Mark Bittman.


Baked Lentil Samosas
Ingredients

Filling:
1 c. dried lentils (any kind)
2 Tbs vegetable oil
1 small onion
salt and pepper to taste
1 medium carrot, finely chopped
1 stalk celery, finely chopped
2 Tbs. minced garlic
2 Tbs. peeled and minced fresh ginger
2 c. vegetable stock or water
2 Tbs. garam masala or curry powder

Dough:
2 c. all-purpose flour, plus more as needed
2 Tbs. cold butter
2 Tbs. yogurt

1. Put the oil in a deep skillet or medium pot over medium heat. When hot, add the onion, sprinkle with salt and pepper, and cook, stirring occasionally for 2 to 3 minutes.
2. Add the carrot, celery, garlic, and ginger and keep cooking and stirring until all the vegetables start to wilt and are fragrant, another 3 to 5 minutes.
3. Add the lentils, stock, and garam masala to the pan with enough water to cover the lentils by about 1/2 inch. Turn the heat to high. When the mixture begins to boil, lower the heat so it bubbles gently.
4. Cover and cook, stirring every so often, until the lentils and vegetables are very soft, about 45 minutes or more. Add stock or water during cooking only if needed to keep the lentils from scorching. The lentils should be fairly stiff and dry when they're done; if not, remove the lid, turn up the heat a bit, and let some of the liquid bubble away. Taste, adjust seasoning and set aside to cool.
5. While the lentils are cooking, combine the flour with a large pinch of salt, the butter, and the yogurt in a food processor; turn on the machine and a few seconds later, add about 1/2 cup of water. Let the machine run, adding a little more water if necessary, until a dough ball forms.
6. Knead the dough for a moment by hand, adding a little more flour if necessary, wrap it in plastic, and refrigerate for at least 30 minutes.
7. Preheat the oven to 350 F. Lightly grease a couple of baking sheets or line them with parchment paper. Sprinkle a work surface with flour , then divide the dough into quarters. Cover 3 of the pieces and divide the fourth into 6 pieces; roll each piece into a round ball. Roll each ball out to a 3-inch diameter. When you have rolled out the first six, put about 1 tablespoon of the filling in the center of each. Brush the rim with a little water, then fold over and seal.
8. Put the samosas--about 1 inch apart--on the prepared baking sheets. Keep covered with plastic wrap while you repeat with the remaining dough. Bake the samosas until golden brown, turning as needed, about 30 minutes, and serve hot.


Thursday, February 19, 2009

Indian inspiration


I was the host of our most recent girls' dinner. I have always loved the flavors and scents of Indian cuisine. I even bought an Indian cookbook several years ago, but was intimidated by the ingredient lists and many components to an Indian dinner, so the cookbook sat fairly untouched on the bookshelf. So, for this dinner I decided to buck up and at least attempt an Indian dinner. The sources for the menu came from Classic Indian Vegetarian and Grain Cooking by Julie Sahni and How to Cook Everything Vegetarian by Mark Bittman.

So, after I planned my (ambitious) menu I needed to gather some of those specialized ingredients. I found my treasure trove at the Indian Supermarket in Silver Spring, MD. Pictured here are just a sampling of the many spices and legumes that I picked up.
In the next few days, I'll be posting some of the recipes that came from this dinner, but for tonight, here's the recipe for the soup course: Curry-Laced Tomato-Lentil Broth (tomato rasam). Adapted from Sahni. This soup was very fragrant and the flavor of the curry leaves intensified the soup's flavor.

Lessons learned from this dish: I probably should have thinned this out a bit with some water before serving since the soup was quite thick.

Get the recipe here.

Curry-Laced Tomato-Lentil Broth
Ingredients
2 c. tomato puree (I used the canned stuff, but you could use fresh or canned whole tomatoes and rough chop them)
3 c. cooked lentils (I used a mix of French and brown lentils)
1 c. water
1 1/2 tsp. ground cumin
2 tsp. ground coriander
1/4 - 1/2 tsp. cayenne
1 Tbs. minced onion
1 tsp. minced garlic
2 tsp course salt, or to taste
1 Tbs lemon juice

For the spice perfumed butter:
1 Tbs. ghee (this is basically just browned butter with the milk solids strained off)
1 tsp. black mustard seeds
8 curry leaves or 2 Tbs. fresh cilantro

1. Put the lentils in a a 3- or 4- quart deep pot. Add 1 c. water and whisk for a minute to crush some of the lentils.
2. Add the pureed tomatoes, cumin, coriander, cayenne, onion garlic, and salt and bring to a boil. Lower the heat and cook at a gentle boil, partially covered for 10 minutes.
3. Add the lemon juice and continue cooking for 1 minute.
4. Turn off the heat and keep covered while you make the spice-perfumed butter.
5. Heat the ghee in a small frying pan until very hot.
6. Add the mustard seeds and the curry leaves.
7. Shake the pan. Once the mustard seeds start to pop, turn off the heat.
8. Pour the entire contents of the pan into the soup and stir well.
9. Serve and enjoy!

Welcome to economists in the kitchen!

We are a small group of economists who love to cook. We aspire to try new cuisines and new cooking techniques. Not all of our experiments are successful, but we're enjoying the learning experience.

We'll be posting our kitchen experiments plus our greatest hits here. We hope that you enjoy browsing through this blog and get inspired to experiment in your own kitchen.


-Emily, Julie, Molly and Rebecca