Continuing on my Risotto kick, I made this mostly for Lana for when Joel and I were out of town. this is also from Emeril and since I knew Lana likes all the ingredients, I thought it was a safe bet. Plus since my dad doesn't like anything too exotic, i thought this would satisfy him too.
Ingredients:
3 T Olive oil
1/3 C minced red onion
1 T minced garlic
2 C orzo
4 cups stock heated (I used chicken, but veggie would work too.)
1 t salf
1/2 t pepper
2 C diced fresh tomatoes (I actually just poured in a can of diced tomatoes including the juice.)
1/2 C diced fresh mozzarella cheese
1 1/2 T thinly sliced basil
Directions:
1. cook onion and garlic in hot oil until fragrant ~ 30 seconds. Add Orzo and stir to coat.
2. gradually add the stock in 1/2 cup increments, stirring until all the liquid has been adsorbed before adding more.
3. if using can tomatoes, add in about half way through, if using fresh wait until end and just heat through 1 to 2 minutes. Season with salt and pepper.
4. add mozzarella and cook until just incorporated 2 to 3 minutes.
5. Garnish with basil and serve.
Thursday, April 22, 2010
Broiled Zucchini
This is just Emeril's official take on the way I frequently prepare this veggie - sometimes I add peppers and onions too - depends on what i have on hand. I did like the whole garlic in there, that's something I'll add to my rotation.
Ingredients:
2 pounds zucchini
4 garlic cloves
1/4 cup Olive Oil
1 1/2 t salt
1 t fresh ground pepper
4 fresh thyme sprigs
Directions:
1. Position the rack 5 or 6 inches from the broiler and preheat
2. cut zucchini in half lengthwise and then into 6 to 8 pieces each.
3. toss everything together in a bowl to coat well.
4. broil for about 15 minutes, stirring occasionally until well caramelized.
5. remove thyme sprigs and serve immediately.
Spring Green Risotto

I received mostly positive feedback from this recipe. As with most risottos it does take a while to make if only for the stirring, but it is an easy recipe, especially if you cut everything up beforehand like I did.
I did not cook the asparagus separately like the recipe called for and while I did add the mascarpone cheese, I think it would have been plenty creamy without it. I also used a prepared veggie stock in lieu of the homemade chicken.
Thanks Ina Garten.
Ingredients
- 1 1/2 tablespoons good olive oil
- 1 1/2 tablespoons unsalted butter
- 3 cups chopped leeks, white and light green parts (2 leeks)
- 1 cup chopped fennel
- 1 1/2 cups Arborio rice
- 2/3 cup dry white wine
- 4 to 5 cups simmering chicken stock, preferably homemade
- 1 pound thin asparagus
- 10 ounces frozen peas, defrosted, or 1 1/2 cups shelled fresh peas
- 1 tablespoon freshly grated lemon zest (2 lemons)
- Kosher salt and freshly ground black pepper
- 2 tablespoons freshly squeezed lemon juice
- 1/3 cup mascarpone cheese, preferably Italian
- 1/2 cup freshly grated Parmesan, plus extra for serving
- 3 tablespoons minced fresh chives, plus extra for serving
Directions
Heat the olive oil and butter in a medium saucepan over medium heat. Add the leeks and fennel and saute for 5 to 7 minutes, until tender. Add the rice and stir for a minute to coat with the vegetables, oil, and butter. Add the white wine and simmer over low heat, stirring constantly, until most of the wine has been absorbed. Add the chicken stock, 2 ladles at a time, stirring almost constantly and waiting for the stock to be absorbed before adding more. This process should take 25 to 30 minutes.
Meanwhile, cut the asparagus diagonally in 1 1/2-inch lengths and discard the tough ends. Blanch in boiling salted water for 4 to 5 minutes, until al dente. Drain and cool immediately in ice water. (If using fresh peas, blanch them in boiling water for a few minutes until the starchiness is gone.)
When the risotto has been cooking for 15 minutes, drain the asparagus and add it to the risotto with the peas, lemon zest, 2 teaspoons salt, and 1 teaspoon pepper. Continue cooking and adding stock, stirring almost constantly, until the rice is tender but still firm.
Whisk the lemon juice and mascarpone together in a small bowl. When the risotto is done, turn off the heat and stir in the mascarpone mixture plus the Parmesan cheese and chives. Set aside, off the heat, for a few minutes, sprinkle with salt and pepper, and serve hot with a sprinkling of chives and more Parmesan cheese.
Monday, April 12, 2010
Caramelized Onion, Sausage, and Basil Pizza
 So, I happened to catch the pizza party episode of "Giada at Home" over the weekend and got inspired to try her caramelized onion, sausage, and basil pizza. I am pleased to say it did not disappoint! You can find the recipe here.
A lot of the local grocery stores around here sell pre-made fresh pizza dough in their refrigerated section -- it's just as good as the dough you can make from scratch, but you can buy it much quicker than you can make it :) -- so I picked up the dough from Harris Teeter, as well as their store-made sweet Italian chicken sausage to make this. And as a Wisconsin girl, I loves me some cheese, but having just a few gorgonzola crumbles on top for flavor was a nice change of pace. Definitely a good Sunday night treat!
When life hands you a huge loaf of bread...
Last week I went to the farmer's market and saw an incredibly crusty loaf of bread. Yes, it did look a little big, but little did I realize just how huge the thing was until the bread man packaged up my loaf in a shopping bag. Needless to say, I had to stretch the creativity a bit beyond your typical bread and cheese snacks to use up the bread before it went bad. Below is a pictorial adventure of me and the huge loaf of bread.
Of course, to start things off, I sliced into this thing and topped it with Cowgirl Creamery's St. Pat, an Echo Mountain blue, and tomme de Bordeaux.


For breakfast, I made an egg strata. Recipe coming later...

For lunch we topped thick slices with a Nicoise-style tuna salad.

Our final meal with this loaf was a very large panzanella, which we will probably be eating for the rest of the week.

Overall, it was a fun experience, and believe it or not, the bread was still pretty good by day 4.
Sunday, April 11, 2010
Fattoush

Much like its Italian counterpart (panzanella), this salad is a great way to use up stale bread, though in this case the bread is flatbread or pita. Though I served this for Greek night, fattoush's roots lie a little farther to the east in Syria.
Much like panzanella, use what you've got handy. Below is the version that I made this particular night.
(As an aside: I discovered that I'm apparently allergic to sumac, so if someone wants a free bottle of it, let me know.)
Fattoush
Ingredients:
Pita bread (about 2 pieces)
1/2 medium red onion
1 English cucumber, diced
1 red bell pepper, diced
1 pint of grape tomatoes, halved (if it's tomato season, use the real deal, diced)
1/2 c. basil, torn
2 T mint, torn
1/4 c. olives (optional)
1 T. capers (optional)
1 tsp sumac (OPTIONAL!!)
olive oil
1-2 tsp red wine vinegar
salt and pepper to taste
Method:
- If your pita bread is not stale, tear the pita bread into bite-sized pieces. Place the bread on a baking sheet and let it hang out in a 350 degree oven for 10 minutes or so until it's nice and crispy.
- In a large bowl, combine the pita bread, tomatoes, cucumbers, bell pepper, red onion, torn herbs to taste and olives, capers, and sumac (if using). Toss.
- Add in red wine vinegar and a decent glug (3 T.) of olive oil. You want to be able to coat the veggies and still have enough dressing for the pita bread to soak up.
- Add salt and pepper to taste.
- You'll want to let this sit for 15 minutes or so before serving. You want the crispy bread to partly soak up some of the vegetable juices, but still have a good bit of texture.
Tabouleh
Tabouleh is one of my favorite salads. I had it for the very first time on one of our family road trip vacations to California back in the 80s. We had this at a stop in--Oklahoma City--who knew? Tabouleh is perfect for when you want something filling, but you don't want to make a big production in the kitchen. All you need is a bowl, a knife, and a cutting board. (Also a spoon would be handy.)

One of the best things about this salad is you get a healthy dose of your greenery, plus the added bonus of a whole grain. It also keeps for a while in the fridge, so it makes for a great lunch the next day. You can also transform this as a filler for endive leaves for a party appetizer, or wrap it up in a butter lettuce leaf as a low-carb burrito, or even use it as a topping on a veggie patty.
Like pretty much anything I make, you can mix and match the ingredients to go with what you've got on hand or what you're feeling like for the day. For example, some other herbs you could use are marjoram, tarragon, basil, or arugula. One thing that is a must, the greenery must outweigh the bulgur wheat. The salad should be more green than tan.
Tabouleh
Ingredients:
1/2 c. bulgur wheat
1 c. boiling water
2 lemons
1 bunch of parsley
1 c. mint leaves
1 English cucumber
grape tomatoes, halved
olive oil
salt and pepper to taste
Method:
- In a heatproof bowl, mix bulgur wheat and boiling water. Cover and let sit.
- Meanwhile, chop the cucumber into a small, bite-sized dice. And finely chop the parsley and mint.
- Once the bulgur has absorbed all of the the water, zest one of the lemons into the bulgur.
- Halve both lemons and squeeze the juice over the bulgur. Add a healthy pinch of salt, several grinds of pepper, and a tablespoon or so of olive oil. Toss well to combine.
- Add in herbs, cucumber, and tomatoes. Gently toss and taste for seasoning. You may need to add more salt.
You can either serve this as is, or it will hold for a while at room temp.
Wednesday, April 7, 2010
Cardamom meringues
Everyone seems to love these cookies, and they are incredibly easy to make. This recipe produces cookies that I would call "medium-rare" in the meringue world: they are brittle on the outside and very chewy on the inside. For a slightly firmer cookie, leave the baking sheets in the oven until cool so that the residual heat continues to cook the meringues. For a crisp meringue, bump the temperature up another 15-20 degrees and leave in the oven until cool.*
From Swedish Cakes and Cookies (2008)
Ingredients:
* Of course, it could also be that my oven runs cool. If you give this recipe a try, let me know how they turned out for you.
From Swedish Cakes and Cookies (2008)
Ingredients:
- 3 egg whites
- 1/3 cup sugar
- 1/2 cup powdered sugar
- 2 tablespoons cornstarch
- 3/4 teaspoon ground cardamom
- Preheat oven to 210 degrees F (100 degrees C)
- Beat the egg whites with half the regular sugar until stiff, preferably with an electric mixer.
- Add the remaining sugar, beating until thick and glossy, with no granules left.
- Combine the powdered sugar, cornstarch, and cardamom and fold into the egg white mixture.
- Spoon into a piping bag with a star tip and pipe small kisses or other shapes onto a parchment-lined baking sheet. (MG - You can just as easily drop heaping teaspoonfuls of batter onto the baking sheet. Not as pretty, but also not as messy.)
- Bake on the center oven rack for 45-60 minutes, or until they are very dry and light.
* Of course, it could also be that my oven runs cool. If you give this recipe a try, let me know how they turned out for you.
Finnish Spoon Cookies (Lusikkaleivat)
These cookies are a little fussy but worth the effort. The browned butter imparts a nutty flavor to the dough. Use cloudberry jam to make them extra special.
Some of the recipes I found specifically called for letting the cookies sit for a couple of days before serving to allow the flavors to blend. I did this for my Scandinavian dinner, and I agree that the flavor was better after a couple of days. Of course, they are delicious when they are freshly made, too.
Recipe courtesy of foodnetwork.com
Ingredients:
 The dough looks like wet sand.
 Pressing the dough into spoon-shaped halves is a painstaking process.
 The cookies are cooling before assembly.
 Finished cookies dusted with powdered sugar.
Some of the recipes I found specifically called for letting the cookies sit for a couple of days before serving to allow the flavors to blend. I did this for my Scandinavian dinner, and I agree that the flavor was better after a couple of days. Of course, they are delicious when they are freshly made, too.
Recipe courtesy of foodnetwork.com
Ingredients:
- 1 cup (2 sticks) unsalted butter
- 2 cups all-purpose flour
- 3/4 teaspoon baking powder
- Pinch fine salt
- 1 large egg yolk
- 3/4 cup sugar
- 1 tablespoon pure vanilla extract
- 1/4 to 1/3 cup jam, such as a berry, plum or cloudberry
- Confectioners' sugar, for dusting
- Preheat the oven to 325 degrees F. Line 2 baking sheets with parchment paper or silicone baking mats.
- Melt the butter in a small, heavy-bottomed saucepan over medium heat. Continue to cook, swirling the pan occasionally, until the butter browns lightly and smells slightly nutty, about 15 minutes. Transfer the butter to a medium bowl -- be sure to get all the tasty brown bits -- and cool slightly.
- Meanwhile, whisk the flour, baking powder and salt in another medium bowl.
- Whisk the egg yolk, sugar and vanilla into the cooled browned butter.
- Stir the dry ingredients into the butter mixture to make a uniform but crumbly dough that looks like wet sand.
- Scoop out dough with a small teaspoon (the kind you set the table with, not the ones you measure with). Rock spoon gently back and forth against the side of the bowl, packing the dough into the spoon, then scrape/slide the spoon against the inside of the bowl to make spoon-shaped cookies. Trim excess dough with your fingers and slide out onto the prepared pans, preserving their shape. (Try to make sure you form an even number of cookies, since these sandwich together.)
- Bake cookies until just browned, about 12 to 15 minutes. Cool almost completely on the baking sheets, and then transfer cookies to a rack to cool.
- When cool, spread 1/2 teaspoon jam on the flat side of a cookie, and then sandwich together with a second cookie. Repeat until all cookies have met their match. Lightly dust the cookies with the confectioners' sugar. Serve.
 The dough looks like wet sand.
 Pressing the dough into spoon-shaped halves is a painstaking process.
 The cookies are cooling before assembly.
 Finished cookies dusted with powdered sugar.
The dough can be prepared several hours ahead and stored at room temperature. Freeze baked cookie halves wrapped tightly in plastic wrap, followed by aluminum foil for up to 2 weeks. When ready to serve, defrost at room temperature and assemble as desired. Store sandwiches in an airtight container for up to 3 days. Do not store with crisp cookies, as moisture from the jam will soften the texture of other crisp cookies.
Food WTF: Cloudberries
Cloudberries are another tasty discovery from our trip to Sweden. I used cloudberry jam to make lusikkaleivat (Finnish spoon cookies).
We were told that they grow only in the Arctic Circle, but apparently that is not true. The locals must have thought they can tell the stupid Americans anything and (of course) we would believe them.
Anyway, here's what Wikipedia has to say:
The cloudberry (Rubus chamaemorus), also called bakeapple in Atlantic Canada, is a slow-growing alpine or sub-Arctic species of Rubus, producing amber-colored edible fruit. The botanical name (chamæmorus) derives from the Greek khamai ("on the ground") and moros ("mulberry"). Cloudberry is the name for both the plant and the fruit.
Cloudberries occur naturally throughout the Northern Hemisphere from 78°N, south to about 55°N, and very scattered south to 44°N mainly in mountainous areas. In Europe and Asia, they grow in the Nordic countries, especially in Finland and much in the Baltic states; sometimes in the moorlands of Britain and Ireland, and across northern Russia east to the Pacific Ocean. Small populations are also found further south, as a botanical vestige of the Ice Ages; it is found in Germany's Weser and Elbe valleys, where it is under legal protection. In North America, cloudberries grow wild across most of Canada / Alaska, and in the lower 48 states of the United States in northern Minnesota, New Hampshire, Maine, and a small population on Long Island, New York.
The cloudberry can withstand cold temperatures down to well below -40°C, but is sensitive to salt and to dry conditions. It grows in bogs, marshes and wet meadows and requires sunny exposures in acidic ground (between 3.5 and 5 pH).

So, what do these little beauties taste like? Sadly, we didn't have the opportunity to taste a fresh cloudberry, what with our being there in the dead of winter, but they are described as tart. Cloudberry jam, however, is glorious! There is a honeyed aspect to it that reminds me a little of quince jam; however, the flavor is squarely in the berry camp. If the sunshine of those heartbreakingly rare and beautiful Arctic summer days could be stuffed into a can, I like to think it would taste like this.
I have yet to see cloudberry jam in a brick-and-mortar store around here, but thanks to the power of the intertubes, you can have that Arctic sunshine delivered to your door. (I'm a fan of Scandia Food, myself.) That said, it ain't cheap. Based on my own surfing, a jar will set you back about $10. That might sound a little extravagant when you can buy a jar of Smucker's for less than half the price, but as far as luxuries go, it's an affordable one. (Think about it, for the price of a Prada bag, you could buy 120 jars of cloudberry jam!) Treat yourself -- you won't regret it.
Tuesday, April 6, 2010
Greek night!
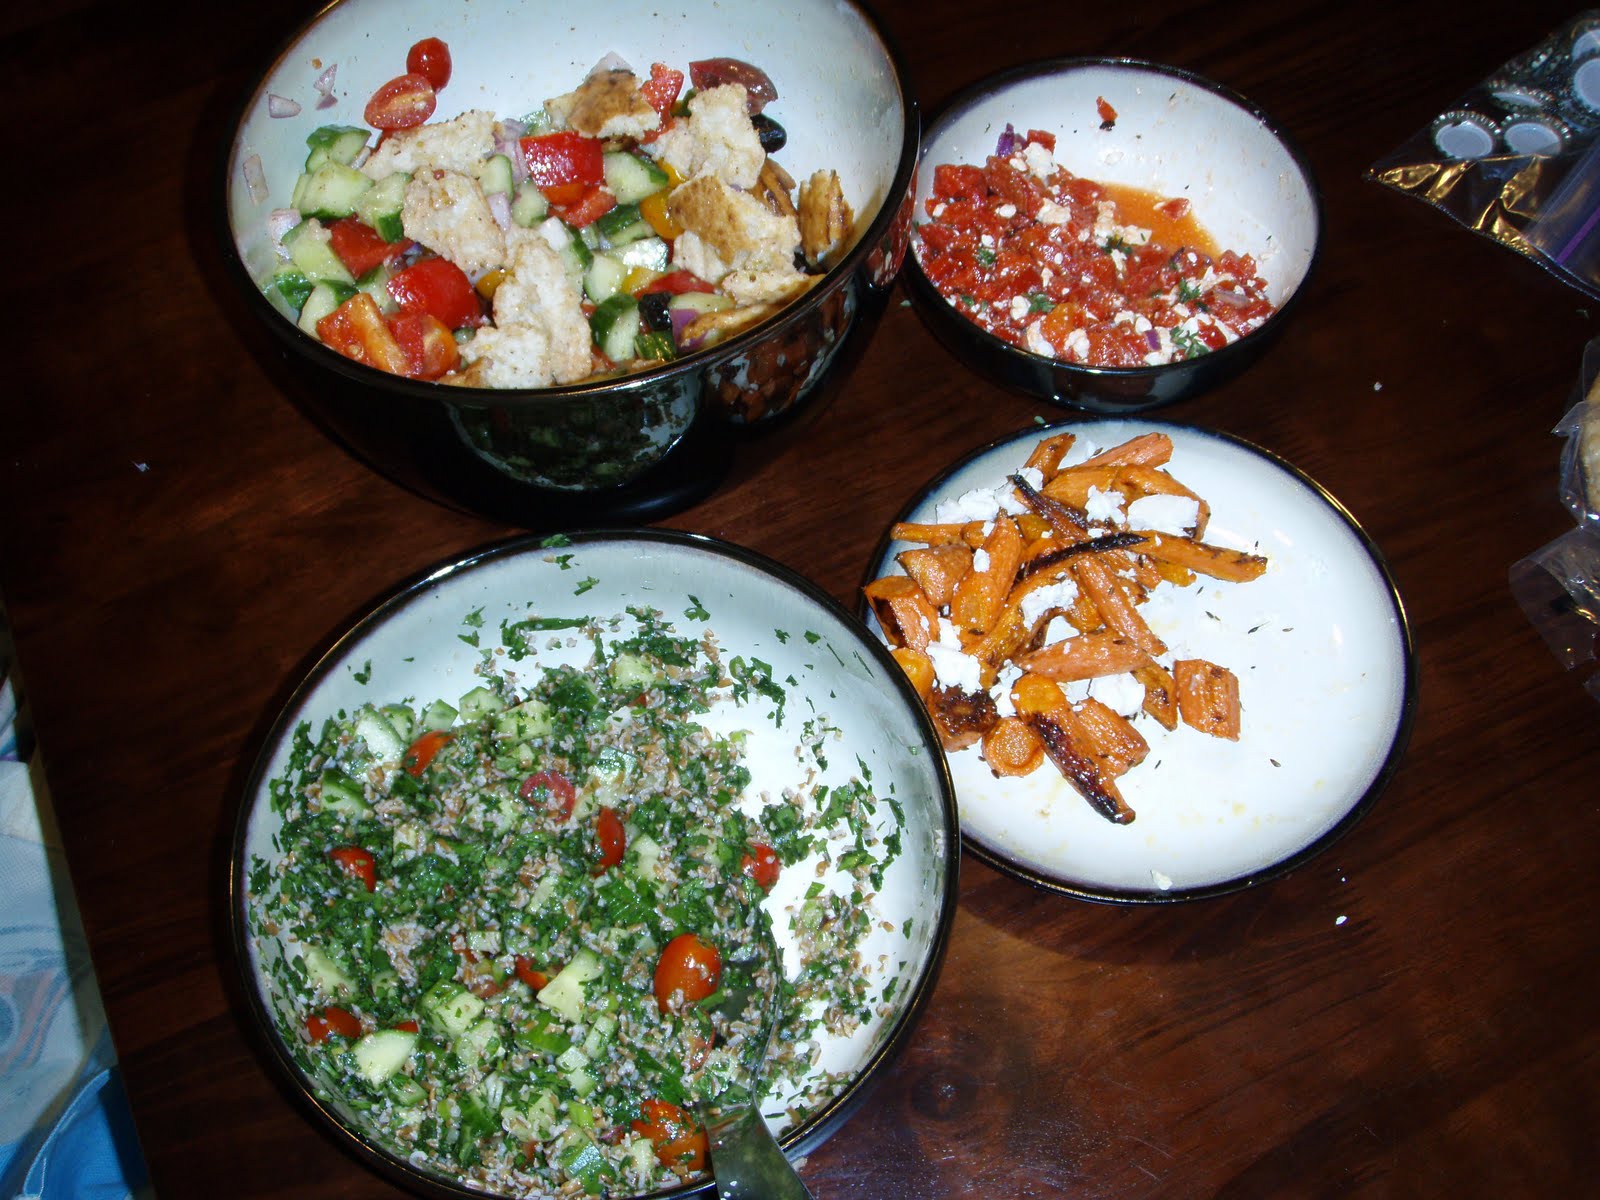
When the weather starts to turn warm, I like to have the occasional Greek night. This mostly consists of salads, dips, or other dishes that are fine to have sit at room temp for a while and hold up pretty well over a couple of days of lunchtime meals. To be perfectly honest, most of these dishes are not truly Greek, but Mediterranean-inspired doesn't exactly roll off the tongue, now does it? The great thing about most of these dishes is that you can really adjust these to your own taste buds... Love feta cheese--just add more. Not big on red onion, dial it back a little, or leave it out entirely.
This particular night's menu consisted of fattoush, htipiti, tabouleh, hummus, and roasted carrots. (No, I do not know how to cook for 2, but I am working on it.)
This post has both the htipiti and roasted carrots recipes. Both require very little effort. Posts to follow on the fattoush and tabouleh.
Htpiti

Ingredients:
2-4 roasted red peppers* (or one really large jar)
sprigs of thyme
1-2 T finely chopped red onion or shallot
olive oil
feta cheese
salt & pepper
Method:
- Chop up the red peppers pretty finely.
- Pull the thyme leaves off of about 2-3 sprigs.
- Mix pepper, thyme, onion, in a small bowl.
- Add 1-2 T olive oil, feta cheese and salt and pepper to taste.
Serve with warmed pita bread.
*Note: Yes, you can take the time to roast your own red peppers, but for whatever reason I wasn't in the mood this particular night. I find the ones in the deli section just fine and way less hassle. If you're roasting your own I'd probably do 2-4 peppers, depending on their size.
Roasted carrots with cumin seeds

This dish couldn't be easier. I love the smoky flavor that the cumin seeds give off when they roast up. I know I saw this in a magazine somewhere, but at the moment my recall is failing me.
Ingredients:
1 pound of carrots, washed, peeled and cut in to large chunks
1-2 tsp. cumin seeds
Salt
Olive oil
Feta cheese
Method:
- Preheat oven to 400 degrees Fahrenheit.
- On a cookie sheet toss together carrots, cumin seeds, with enough olive oil to coat, and sprinkle with salt.
- Roast the carrots for about 30 minutes, or until you start to get some nice caramelization. I usually do a toss after 15 minutes or so.
- Remove from oven and top with crumbled feta cheese.
Sunday, April 4, 2010
Tastes like spring -- lavender sorbet
 I made this tasty treat for my Easter dinner dessert. The recipe is so easy, and the results are deliciously elegant. The most difficult part is finding culinary lavender: around here, Penzeys Spices carries it, but it's all behind the counter and you have to ask an employee about it. You'd think you were asking for some sort of black-market item like real pre-bathtub-meth-lab Benadryl. But if you don't have a Penzeys or other gourmet specialty shop near you, surely you can use the magic of the interwebs to bring some lavender your way.
Lavender Sorbet
Ingredients:
- 1 cup sugar
- 2 cups water
- 1 tablespoon culinary-grade lavender buds
- 2-1/2 tablespoons lemon juice
- 2 tablespoons vodka
- In a medium saucepan over medium heat, combine sugar and water until sugar dissolves.
- Add lavender and lemon juice, and stir until mixture comes to a boil; reduce heat to low and simmer for 5 minutes.
- Remove from heat, cover, and let stand for about 10 minutes.
- Place a fine strainer over a large bowl and pour syrup mixture through, straining out lavender flowers. (I like to use a coffee filter to collect the lavender flowers and let the flowers dry, to have candied lavender buds for a garnish. And to eat as a little treat, but that's just me.)
- Chill syrup mixture in refrigerator for about 2 hours or until cold.
- Transfer syrup mixture to ice cream maker and process according to manufacturer's instructions. In last 2 minutes of processing, add vodka to mixture. (Because alcohol has a lower freezing temperature than water, you don't want to add it too soon in the freezing process. Adding it at the end allows the sorbet to freeze well and build up volume, but the vodka will keep the sorbet nice and soft and easy to scoop.)
Subscribe to:
Posts (Atom)